I can't get enough of Mexican, Guatemala, and Navajo textiles. I recently found a Mexican blanket with colors so rich and vibrant I had to have it, but the fabric itself had some wear and tear to it. I would NEVER have the heart to cut up such a piece but this one was struggling in a manor that suggested it needed my help, making it the perfect fabric to DIY into my own ethnic textile bag and boots to wear this fall and winter.
Click o the post to see more...
Thrifted ethnic fabric or blanket.
Fabric scissors
Weldit all-purpose adhesive
Clothespins
Iron (ALWAYS)
Step 1: Cut a piece of fabric that is about 1 1/2-2 inches bigger than the surface area of the bag you want to cover.
Step 2: Fold over the edge of the fabric that is going to be the base of your bag about 1/2 of an inch and iron it down flat.

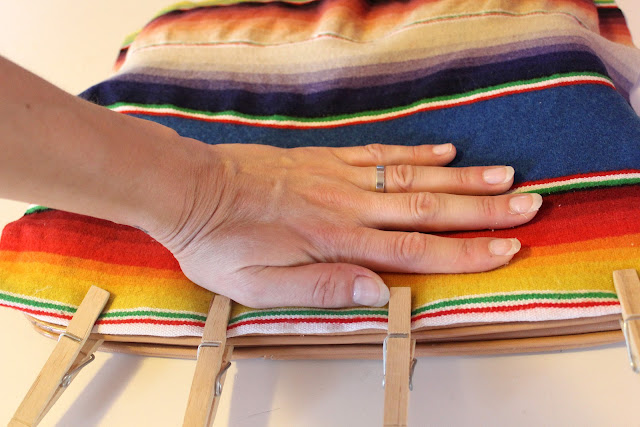
Step 4: Do this all the way along the base of the bag and add clothespins along the way to seal the fabric to the bag fabric.
Step 5: Fold the fabric down good-side to good-side, and add a big several inch zig zag strip of glue ont he bag and pull the fabric back over it and press down.
Step 6: Repeat until the bag is covered.
Step 7: Repeat until that section of the bag is covered.
Step 8: With the 3 sides remaining, cut away any excess fabric. You''ll want an inch to work with for this next part, but any more and it'll be harder to achieve clean corners.
Step 9: Fold under the selvedge edge of your fabric, and glue it while aligning the fold with the bag seam. Pin as you go to hold the fabric in place as the glue dries.
Step 10: Repeat until the bag is covered.

I covered boots in a similar way.

For the boots I sewed the the fabric after ironing it creating an even cleaner hem to work with since these are boots I will wear. Then wrap and glue your fabric to the boot.


Fold, tuck, and glue the perimeter of the base of the boot in the same way you finished the bag edges.
Cut the edges with pinking sheers and over-lap the fabric at the back of the boot and glue down.


No comments:
Post a Comment